|
Earlier this Month, I took my Artwork along to a local horse show. It was a Studio Mascot free day so I thought I would grab the opportunity to start a new piece to work on while I was there. I thought it might be nice for any stall visitors to watch a piece come to life and to see how I work, and I deliberately went for a piece that I thought would appeal to them. This was the photo I chose to work from.  Photo Credit to Eve Barber. I couldn't resist this magnificent boy when I saw this stunning photo. He has so much presence, and the look in his eye is so typical of a Welsh Cob stallion. However, I was naive enough to think it would be relatively simple and that I could get most of it done at the show. How wrong I was... Phase 1 - At the Show So after I'd spent the best part of an hour faffing about with my display, I could finally sit down and start my new drawing.  I decided that due to the fact that the drawing would be 'relatively simple' (pah!) I could just do a quick outline.. freehand. After doing my quick outline, I started to get to work on the good bits, starting with his ears. It didn't take long for me to start to realise that things weren't going brilliantly, that something about him wasn't sitting quite right with me, and why I so often chicken out of drawing the outline freehand. However, this didn't stop one of the show organisers falling for him! Still, this is how far I got with him at the show. 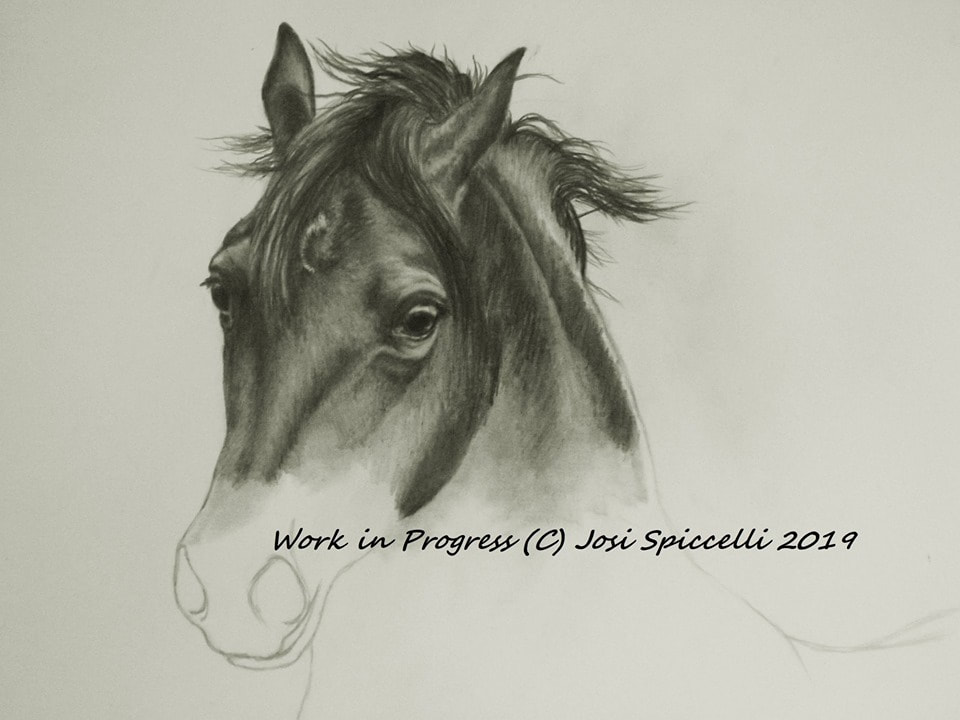 So at this stage, I could already spot a few things going wrong. ~His eye wasn't quite right. Although the general size and expression I was after was there.. it just didn't seem to work properly. ~His jaw was too heavy, giving him the impression of having a short, thick head (not how it is in the photo!) I would need to slim that right down and change the shape. ~His head shape wasn't right. I can see here I had given him too much of a 'dish' in his head. I am used to drawing Arabians, who have that typical 'dish' in their faces and could feel myself automatically leaning towards giving him all the facial features of an Arabian (wide-set eyes and short, dished head). So I slimmed down the cheekbone on the left side (our left!) of his face, and trimmed a large chunk off his jaw. Phase 2 - Back at the Studio Ok so he is looking better, but something is still not right with him. 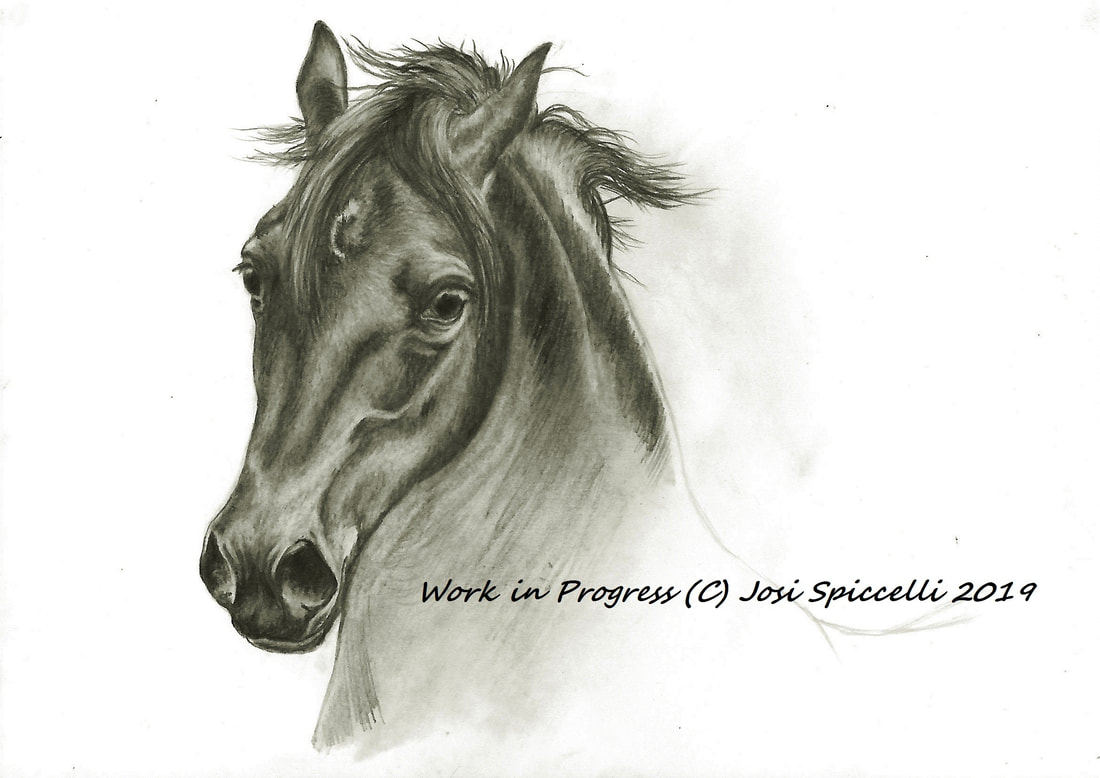 Starting to block in along his jaw, in the hope that it may start to look better. And yes, I can see it coming together slowly. He's looking more like a Cob. Although, I'm not convinced by his eye, the vein next to his jaw (yes, that's supposed to be a vein!)  (Please excuse the slightly over-contrasted scan of him. Slight misjudgement of lighting, I'm afraid). He is looking better, I had to change the shape of his neck next to his muzzle, as although Cob's are known for their strong necks, it was lacking in shape. I still wasn't convinced and was feeling quite tired and frustrated after a long day in the Studio. So I called it a day. Phase 3 - Bringing out the Big Guns I refused to be beaten by this piece. I was determined to crack it, especially seeing as someone had shown interest in buying it. Even if they hadn't though, I wanted to nail it as a personal achievement. So that night, as I often do with pieces that are giving me grief, I put it side-by-side with the reference photo on my iPad and compared it very closely. The red dots show the areas that I felt needed to be altered. You will notice that I didn't mark his eye. I wanted to see how he looked once these alterations were made. But I had a nasty gut feeling that I would have to move his eye over slightly anyway, as they looked too wide-set. 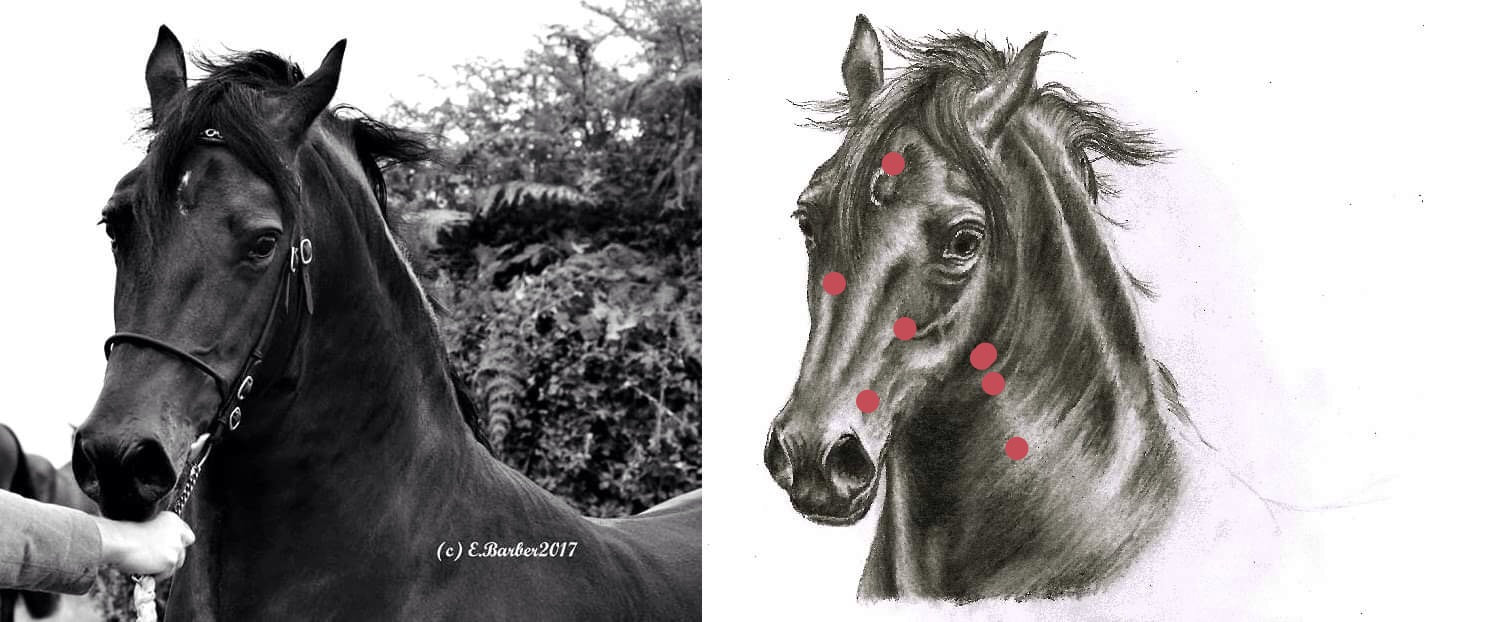 Finally, after a lot of comparing, erasing, re-drawing, re-erasing, walking away, coming back, deep-breathing, not-quite-crying and many cups of chamomile tea later - I made a breakthrough. I moved his vein, re-arranged his face a little (sounds a lot more violent than it was!), mastered the subtle wrinkles on his back, and after a lot more nit-picking, and deciding against a blended background, I eventually put my pencils down in relief. He was complete! And I felt so proud of the result! 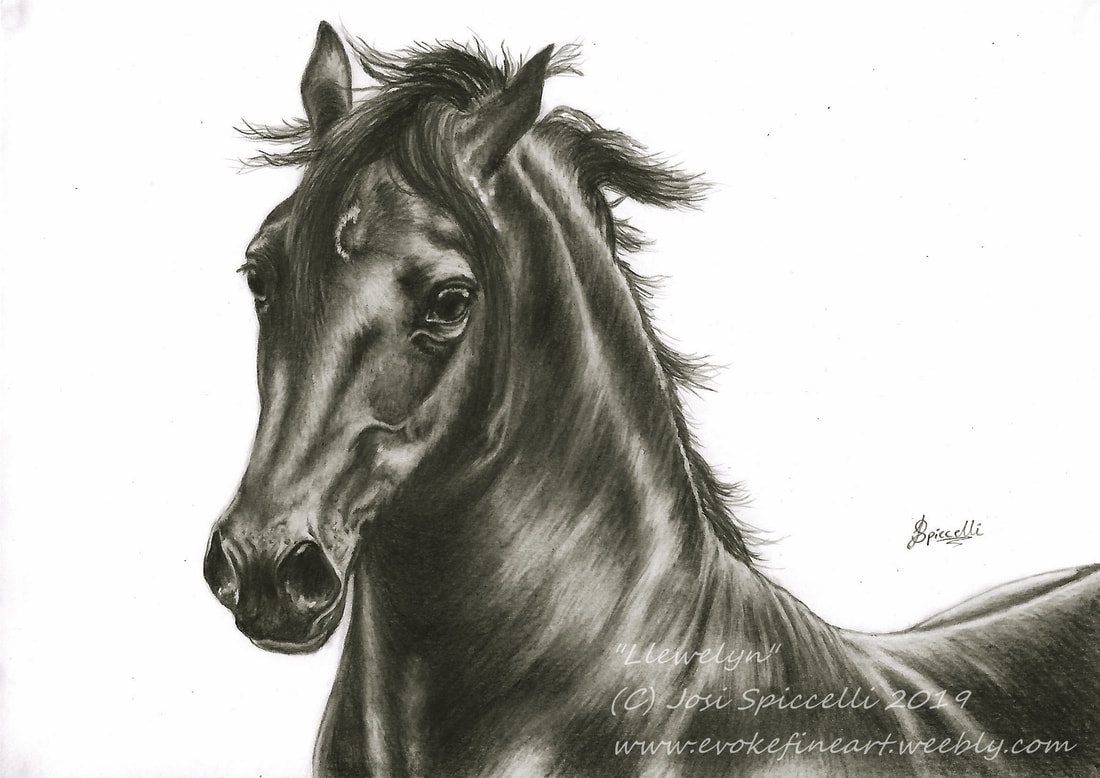 This scan is pretty much spot on to the actual drawing (my scanner is far more reasonable than my camera!)
He will be heading to his (hopefully!) forever home very soon. It was so worth all the effort. I decided to call him "Llewelyn", after the Welsh King. I think he has a certain regal feel about him. Also "Llew" is welsh for lion, a name I was also considering. But in the end I settled for the popular, strong welsh name - now there is no questioning his welsh roots! I really hope you like him, and have enjoyed getting an insight into how he developed. Creating a piece of Artwork is always a journey of sorts. Some are a lot more difficult than others, but every one is unique and special.
0 Comments
Leave a Reply. |
Welcome to My BlogHere you will be able to join me on my Artistic journey, discover where I get my inspiration, follow my latest work and pick up some useful tips and techniques along the way! Categories
All
|
 RSS Feed
